Install Python, Numpy, SciPy, IPython and Pandas on Windows
In this tutorial we’ll setup a Python development environment on Windows 7. After finishing this tutorial you will be ready to start writing numerical applications, data analysis algorithmns and implement various machine learning methods. I’ve always wanted to get back into numerical computing and Python seems like the way to go.
In this tutorial you will be setting up a numerical Python development environment for Windows 7.
As you might have already realized, Python is rather simple to setup on a Linux/MacOSX box but as with many open source based projects getting up and running on Windows is never trivial.
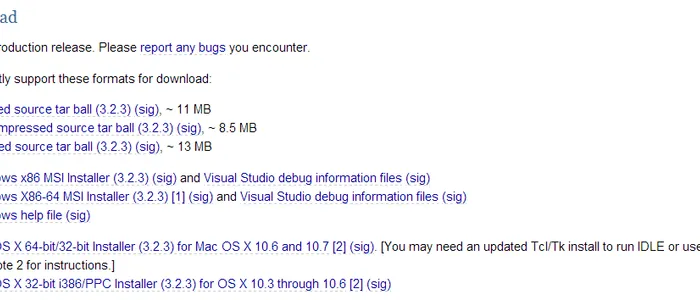
- Visit http://www.python.org and search for Python version 3.2.x
-
The 64-bit version currently doesn’t support NumPy and or SciPy so grab the 32-bit version
- Double click the Microsoft Installer file from Windows Explorer
-
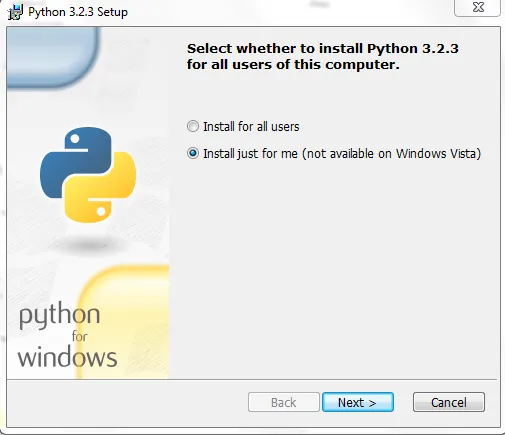
According to Andrew we have to select the option “Install just for me”
-
Click “Next”
-
Install Python to the root directory of your hard disk mine was “C:\Python32”
-
On the page “Customize Python 3.2.x” enable the option “Add python.exe to Path”
-
While still on the page “Customize Python 3.2.x” click “Advanced” this will open a new window
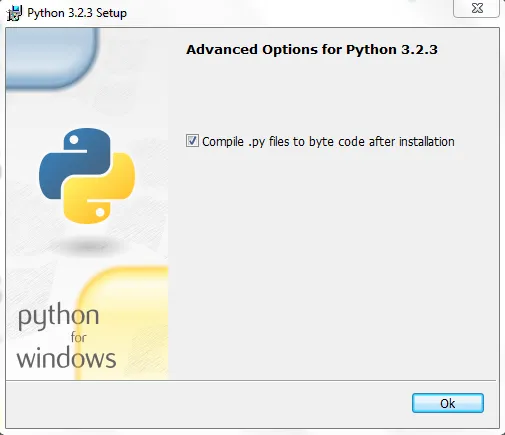
- Check the option on that page; for a discussion for why this option is used see the post on Stackoverflow
- Verify that python installed correctly
-
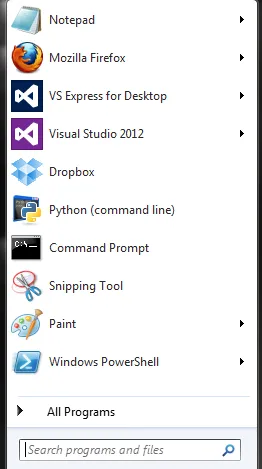
Press the window key or click the start menu and type “python” and the search results should include
-
“Python (command line)” that is the one we want so click it.
-
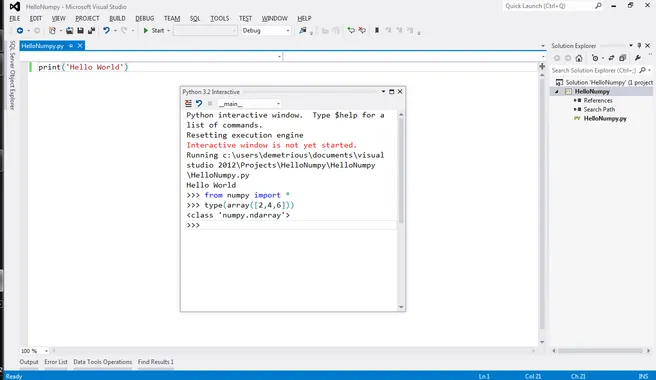
You should be able to run a small Hello world program from the python interactive terminal
- Go install numpy
-
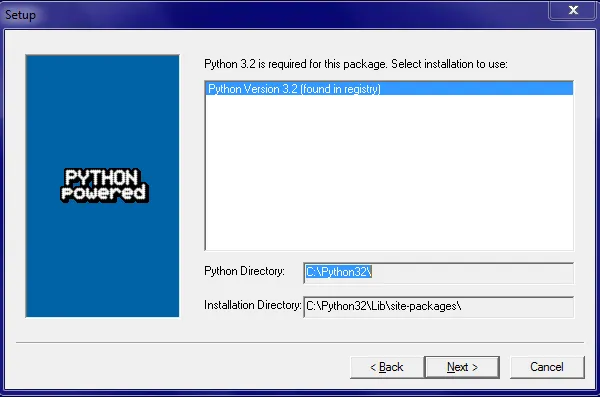
Once downloading is completed run the installer
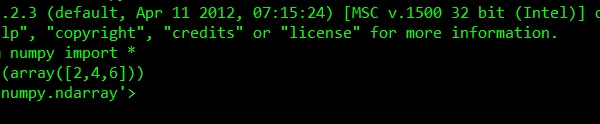
- Verify that numpy was successfully installed by opening a command prompt and running the following code
- Go grab a copy of Visual Studio 2012 if you don’t already have a copy (don’t worry you can use the free express edition)
- I’m using the express version for desktop http://www.microsoft.com/visualstudio/eng/downloads
-
Install the Visual Studio 2012 Isolated Shell the download link is found on the same page
-
Install the Visual Studio 2012 Integrated Shell (same as step 6)
- NOTICE! At this point if you went the free route and installed Visual Studio Express you will actually have two programs, Visual Studio 2012 in addition to Visual Studio Express
-
To use Python you will have to use Visual Studio 2012
-
To use regular C#, C++, VB etc you will need to run the Visual Studio Express version
- Install the Python Tools for Visual Studio
-
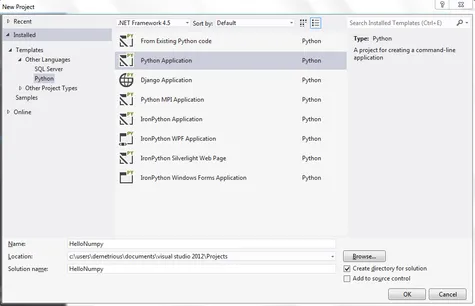
Once you have installed the application you should be able to open Visual Studio 2012 and start a new Python application project
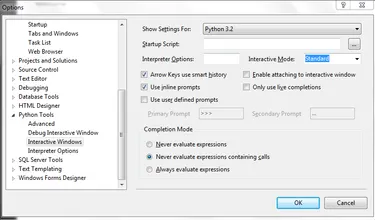
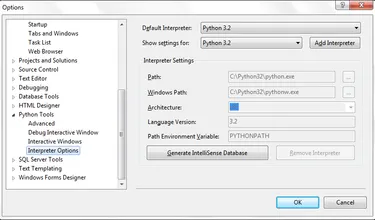
- Within Visual Studio 2012 click Tools >> Options >> Python Tools and change the default version of python to 3.2
-
As you remember from the earlier instructions Numpy currently does not support python 3.3 on Windows
-
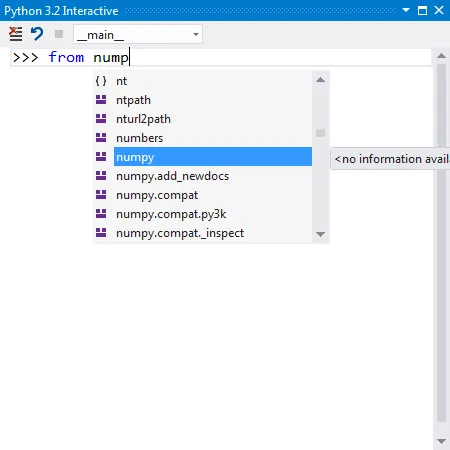
If avaliable regenerate the intellisense database, this is what allows Visual Studio to perform autocomplete
- Next make sure you can get your visual studio 2012 to resemble the screenshots
- Numpy will show up in the autocomplete if you have been doing everything correctly
- Setting up Pandas
-
Go get the latest version of Pandas http://pandas.pydata.org/index.html
-
Since we’re using 32-bit Python 3.2 make sure you download the version that supports it
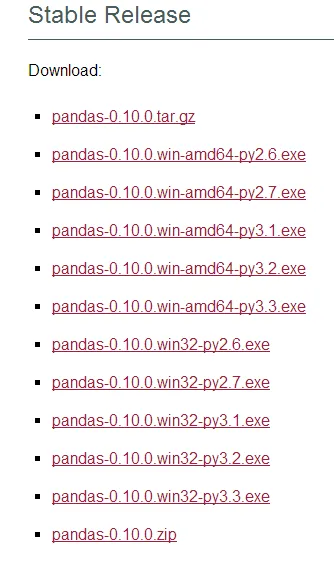
- Download and install it
- Download the dateutil package from http://pypi.python.org/pypi/python-dateutil
-
From within the python-dateutil 2.1 folder copy the folder “dateutil” to “C:\Python32\Lib\site-packages”
-
The “C:\Python32\Lib\site-packages” folder is where 3rd party packages are to be installed
-
You will need this for pandas to work properly
- Download the package called “six” from pypi http://pypi.python.org/pypi/six/1.2.0
-
Unlike dateutil “six” actually needs to be installed from the command line
-
Extract the zipped folder and then copy the contents to “C:\Python32\Lib\site-packages”
-
Go into the six folder and run the following command
-
“setup.py install”
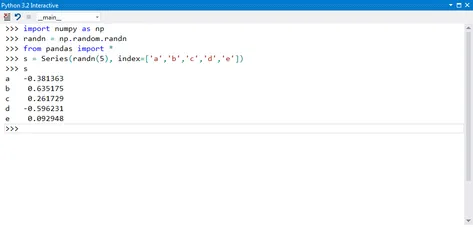
- Verify that pandas is working
-
Open Visual Studio 2012 and either start a new Python application or open an existing one
-
Start the Python Interactive shell and enter the code that appears within the screenshot below
- Install matplotlib for python
-
This tutorial is using python 3.2 and Numpy 1.6.2 for 32-bit Windows
-
https://github.com/downloads/matplotlib/matplotlib/matplotlib-1.2.0.win32-py3.2.exe
-
After installing regenerate the intellisense database
-
Tools >> Options >> Python Tools >> Interpreter Options >> Generate Intellisense database
- Verify that matplotlib is running
-
Special thanks to http://bespokeblog.wordpress.com/2011/07/07/basic-data-plotting-with-matplotlib-part-2-lines-points-formatting/ for the example code
-
Try and reproduce the screenshot below within your visual studio environment

- Install SciPy
-
We’re using Python3.2 so get the appropriate version
-
Right click the installer and “Run as administrator” and then follow the on screen instructions
-
Regenerate the intellisense database within Visual Studio 2012 to ensure that Scipy will be autocompleted
- Install IPython
-
http://www.windowsazure.com/en-us/develop/python/tutorials/ipython-notebook
-
Follow the very detailed instructions on that site except the part about the
ipython_notebook_config.pyfile I couldn’t get that part to work. -
If you get an error relating to missing module JinJa2 then open Powershell and run
easy_install.exe Jinja2 -
I managed to get IPython working correctly using the following from Powershell
ipython3.exe notebook --pylab=inline --profile=nbserver --certfile='C:\Users\YourNameHere\.ipython\profile_nbserver\mycert.pem'